QMK with GitHub Workflow
Setting up a local QMK build environment can be onerous and requires substantial amount of disk space. This is a setup guide for a workflow build environment that runs entirely on GitHub. It uses a standalone userspace repository that will compile QMK firmware in a container. An account on GitHub is the only prerequisite.
Create a Keymap JSON
- Start by visiting the QMK Configurator site.
- Select your keyboard from the drop-down list (and choose a layout if required).
- Use your GitHub username for the
Keymap Namefield, e.g.:
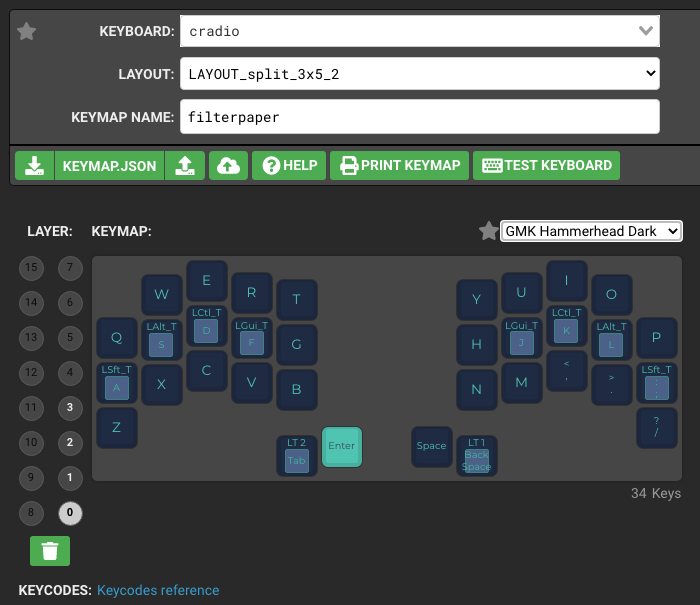
- Customise the key map according to your preference.
- Select download next to
KEYMAP.JSONto save the json file locally. - Rename the file to your keyboard name, e.g.
cradio.json, and note its location.
Create a Repository
- Login to your GitHub account.
- Select the
Repositoriestab, and click onNewon the right. - Use
qmk_keymap(or anything unique) as the repository name. - Leave the other settings as default and select
Create repository:

Upload the Keymap JSON
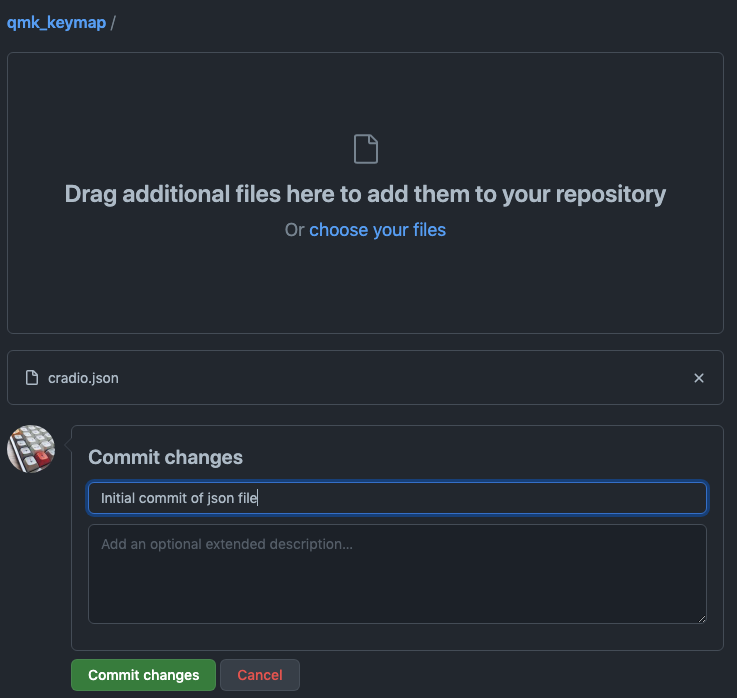
- In the
Quick setuppage that follows, selectuploading an existing file. - Locate the json file (e.g.
cradio.json) from the previous step. - Drag that file into the browser page to upload.
- Write a meaningful commit message and select
Commit changes:
Create the Workflow
Back in the qmk_keymap repository page, press the period (.) key. The github.dev web-based VSCode editor will be loaded. This interface is where you can edit and commit code directly to GitHub.
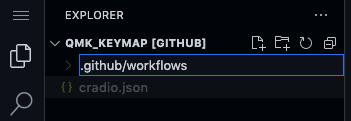
- In the left
Explorersection, click on theNew Foldericon to create a folder named.github/workflows(note the.prefix). Press enter to complete the action:
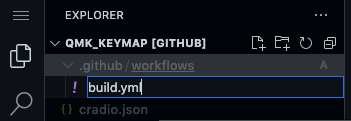
- Click on the new
.github/workflowsfolder and select theNew Fileicon. Create a new file namedbuild.yml:
- With the
build.ymlfile selected, paste the following workflow content into the editor window on the right:
name: Build QMK firmware
on: [push, workflow_dispatch]

jobs:
  build:
    runs-on: ubuntu-latest
    container: qmkfm/base_container
    strategy:
      fail-fast: false
      matrix:
# List of keymap json files to build
        file:
        - cradio.json
# End of json file list

    steps:

    - name: Checkout QMK
      uses: actions/checkout@v2
      with:
        repository: qmk/qmk_firmware
# Uncomment the following for develop branch
#        ref: develop
        fetch-depth: 1
        persist-credentials: false
        submodules: recursive

    - name: Checkout userspace
      uses: actions/checkout@v2
      with:
        path: users/${{ github.actor }}
        fetch-depth: 1
        persist-credentials: false

    - name: Build firmware
      run: qmk compile "users/${{ github.actor }}/${{ matrix.file }}"

    - name: Archive firmware
      uses: actions/upload-artifact@v2
      with:
        name: ${{ matrix.file }}_${{ github.actor }}
        retention-days: 5
        path: |
          *.hex
          *.bin
          *.uf2
      continue-on-error: true
(Do note that the build.yml workflow file requires proper indentation on every line.)
Customising the Workflow
- Matrix
file:section is a list of keymap files to be built. - Change
cradio.jsonkeymap to your json file name. - Additional files (with
-prefix) can be appended here for multiple keyboards.
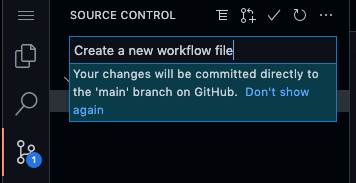
Committing the Workflow
- Select
Source Controlon the left column and enter a meaningful commit message. - Click on the
Commitcheckmark above to commit the file directly to your repository:
Committing a change to the repository will automatically trigger the workflow to build every json file listed in the file: section.
Review GitHub Actions
- Return to your GitHub page and the
qmk_keymaprepository. - Select the
Actionstab to display theBuild QMK Firmwareworkflow. - Select that workflow to display its run from the last commit.
- Successfully compiled firmware will be under the
Artifactssection:

Download and flash the firmware file into your keyboard using QMK Toolbox. If there are build errors, review the job log for details.
Customising QMK
You can proceed to customise the QMK firmware using the Userspace guide with the github.dev editor:
- Create a
config.hfile for QMK variables and definitions. - Create a
rules.mkto enable and disable QMK features. - Create a
source.cfile for your customised code.- Add
SRC += source.ctorules.mkto build this source.
- Add
- Commits will automatically trigger firmware build actions.
Additional keymaps for other keyboards must be retained in json format and appended to the file: matrix list in build.yml.